I came home with these items.

A wonderful old cutting board, $3.00; large textile spool, $5.00; a beautiful green wine bottle with a wooden screw-on cap, $1.00; (hidden behind spool) ... three large brown glass bottles believed to be old snuff bottles, $1.00 each; wonderful large rolling pin with black handles, $3.50; shabby ceiling light, $9.00 and this huge fence stretcher, $3.00, (at least, I think that is what it is), oh yes, this cute little wheel with a hard rubber tire for $2.50. These came from three different Estate sales and all fit well within and below what I would have expected to pay.
Now what am I to do with all this tacky light? 

Well, I planned to make this bare bulb ceiling light fixture into a table lamp and I had just the
perfect antique shades for it.
(Imagine it hanging up-side-down)
I am still working how to use the big old metal
fence stretcher. Likely will end up on one of the kid's ranches.
(I did not put it in this vignette as it was better without it)
(I did not put it in this vignette as it was better without it)
Cutting board and rolling pen are usable but also make a nice display. Old
spool for a candle and the little wheel will be enjoyed where ever it is displayed.

The brown bottles will make nice vases to
display with my other brown bottle collection.

The green bottle to display my
forced bloom of a peach limb.

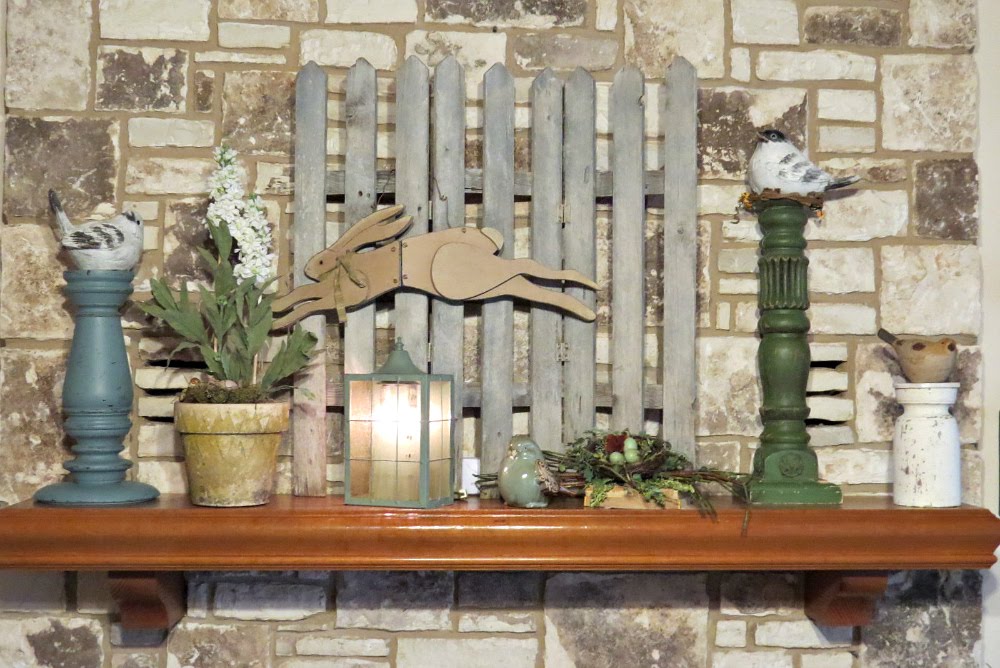
Here is my Vignette ...

For right now, I used all this stuff set up this vignette and I like it pretty much. I added the little plant and white bird.

I save the string I pull
out of burlap when making a fringe and that is what I tied around the
bottle necks.
This Blog really is all about making the tacky ceiling light into a beautiful table lamp.
Before .... 

After ... 

Things that needed to be done:
1. Love shabby chippy paint, but this was just not pretty and

needed to be stripped and painted to match up with the base.
The sockets were bent and actually too big for the light or at least the lamp I wanted to make.


 After I took it apart, I decided to change the sockets to the small
candle style and also change the bobchetes and add crystal prisms.
After I took it apart, I decided to change the sockets to the small
candle style and also change the bobchetes and add crystal prisms.
I have been restoring lamps and lighting fixtures for a lot of years, so had all the parts that I needed.
Now for the shade ...
Small antique silk shades that I had originally planned to use but thinking they may be better on single candle lamps. 
Then I found these in my closet when I went to get the little shades. Wow ... much better ... and only cost $3.00.

Yesterday, when out shopping, I found these shades which I thought would be perfect and I paid $6.00 for them. I like the shape .. nice shades, but maybe a little too tailored.

What do you think ??? Tell me which one you like.
I like all of these, but leaning toward the ones with the little red prisms and eyelash fringe.


Blessings ... Audrey Z.
This Blog was Featured by:
This Blog was Featured by:
Linking up to:
Saturday Show and Tell Be Different act Normal
Funky Junk Interiors SNS
Debbiedoo's Monday Newbie Party
HomeMaker on a Dime Creative Bloggers Party and Hop
Knick of Time Tuesday Link Party
The Shady Porch Rock and Share
Saturday Show and Tell Be Different act Normal
Funky Junk Interiors SNS
Debbiedoo's Monday Newbie Party
Motivated Monday at
Be
Colorful
Making the World Cuter
Monday at Making the World
Cuter
More the Merrier Monday at
DIY Home Sweet Home
Project
HomeMaker on a Dime Creative Bloggers Party and Hop
Knick of Time Tuesday Link Party
The Shady Porch Rock and Share


